Augment Visualization Result
The Graph Exploration panel allows you to augment the visualization of your exploration results in the following ways:
Set different colors according to attributes and accumulator values
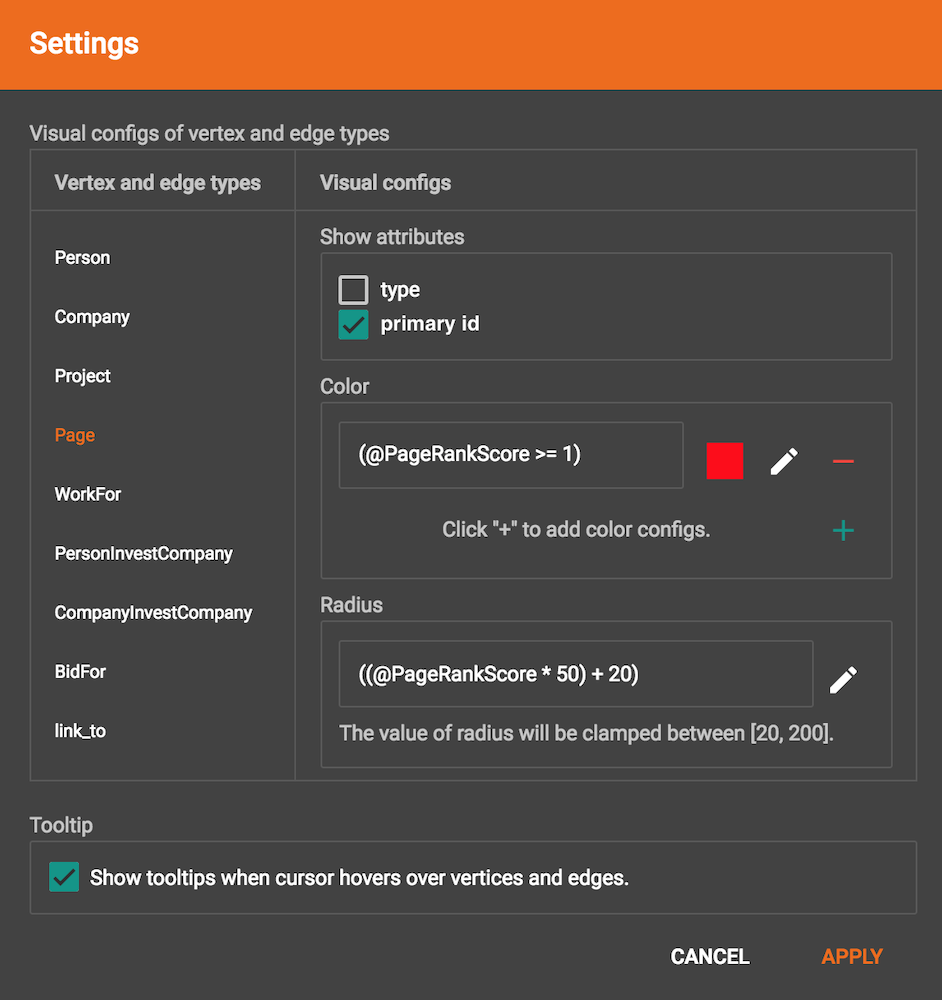
By default, each vertex and edge is rendered as the color you selected in Schema Design page. However, if you want to emphasize some vertices and edges in your visualization result, you can set a different color for them by creating a set of conditions, and assign a different color for each condition. Then vertices and edges satisfying the conditions will be rendered as the newly assigned color.
In the Color section of Settings panel, first choose the vertex or edge type you want to set colors, then click the add button . A new color configuration entry appears:
Click the Edit color config button , in the pop up window choose red color, and build a condition specifying @PageRankScore >= 1.0:
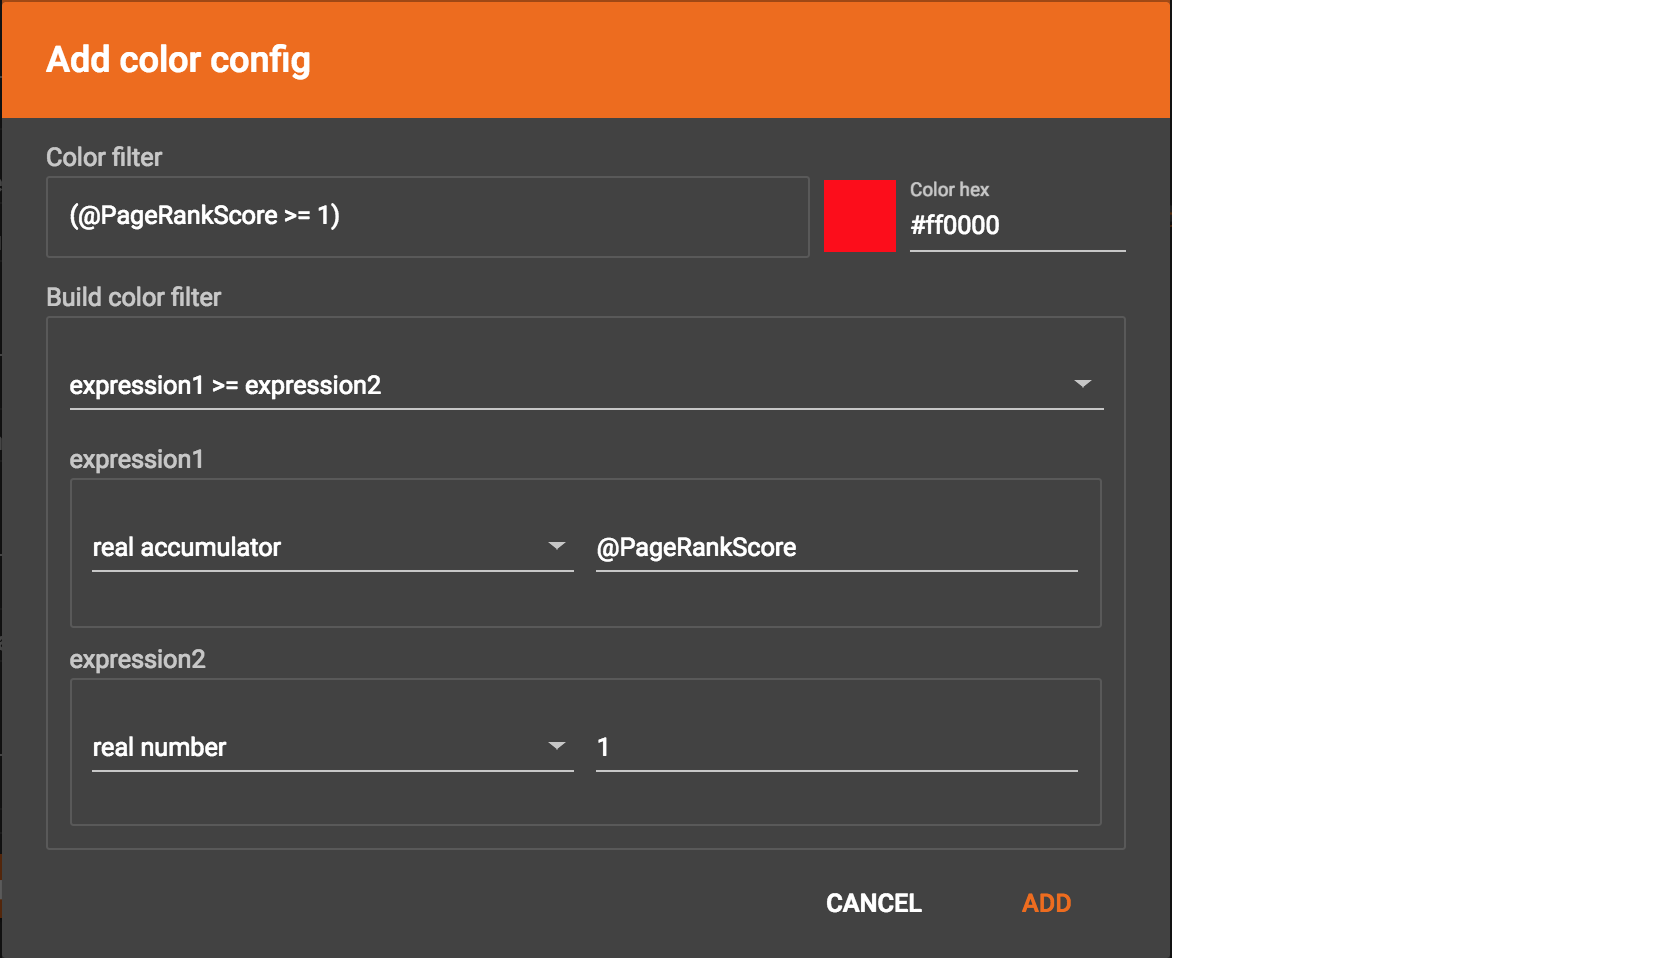
Click ADD, and the condition and updated color is shown in the Color settings section:

Similarly, you can add another color configuration that @PageRankScore between [0.5, 1) will be green. The final Color settings section will look like:

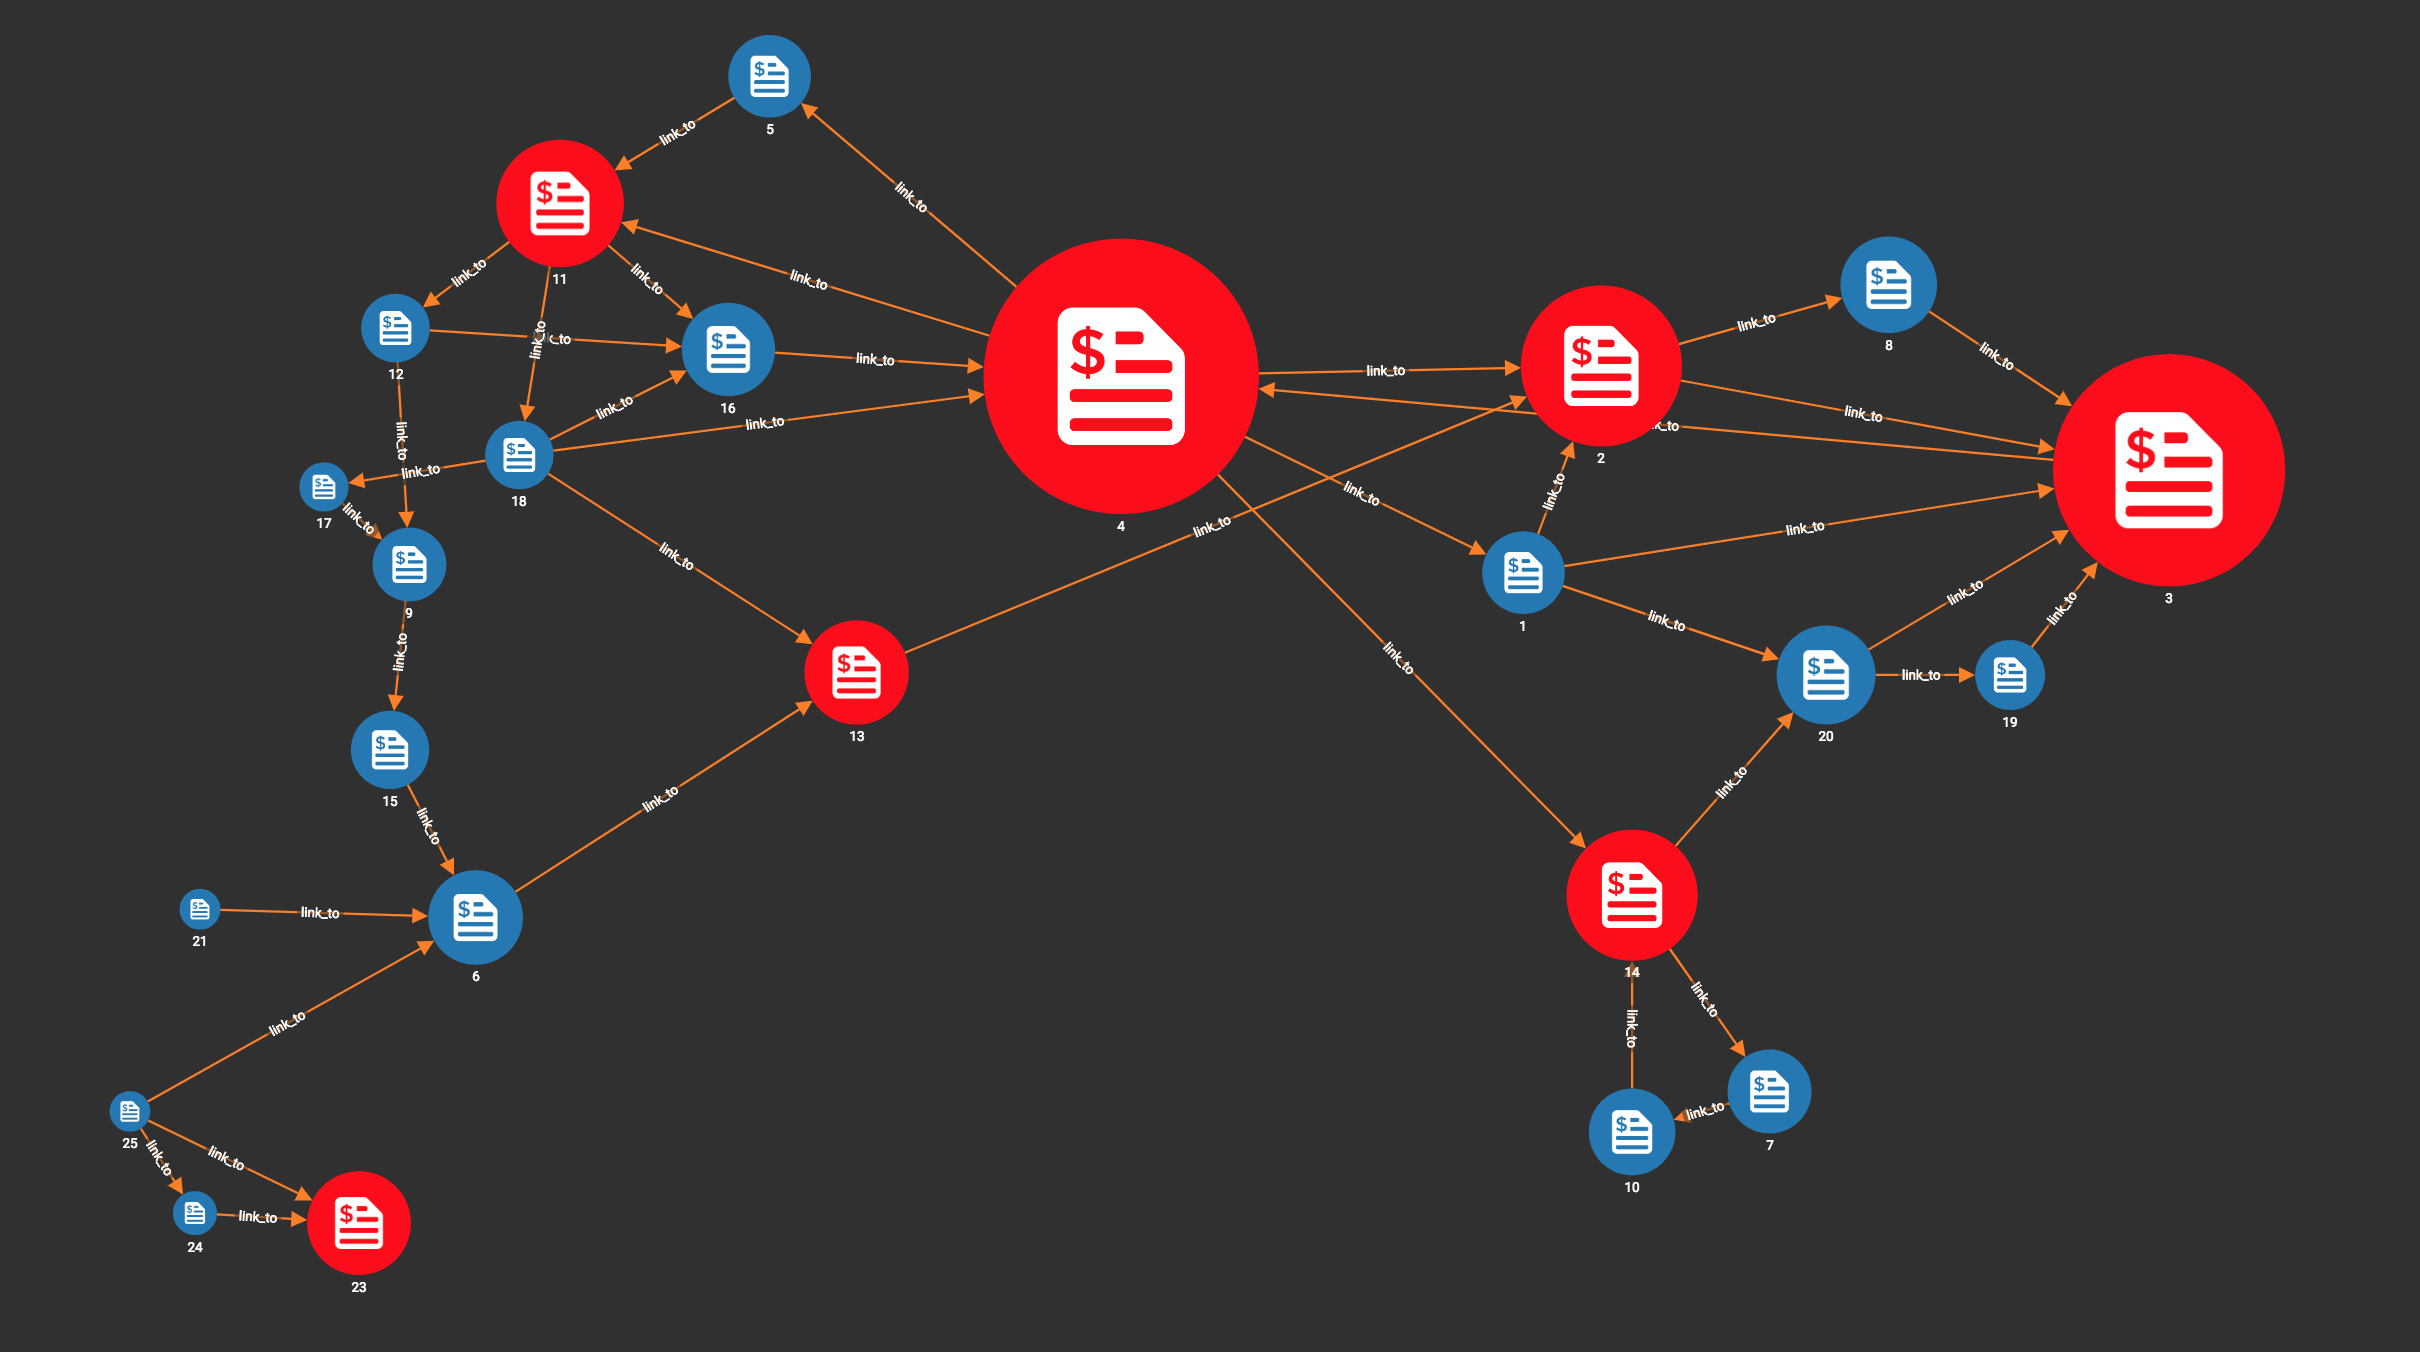
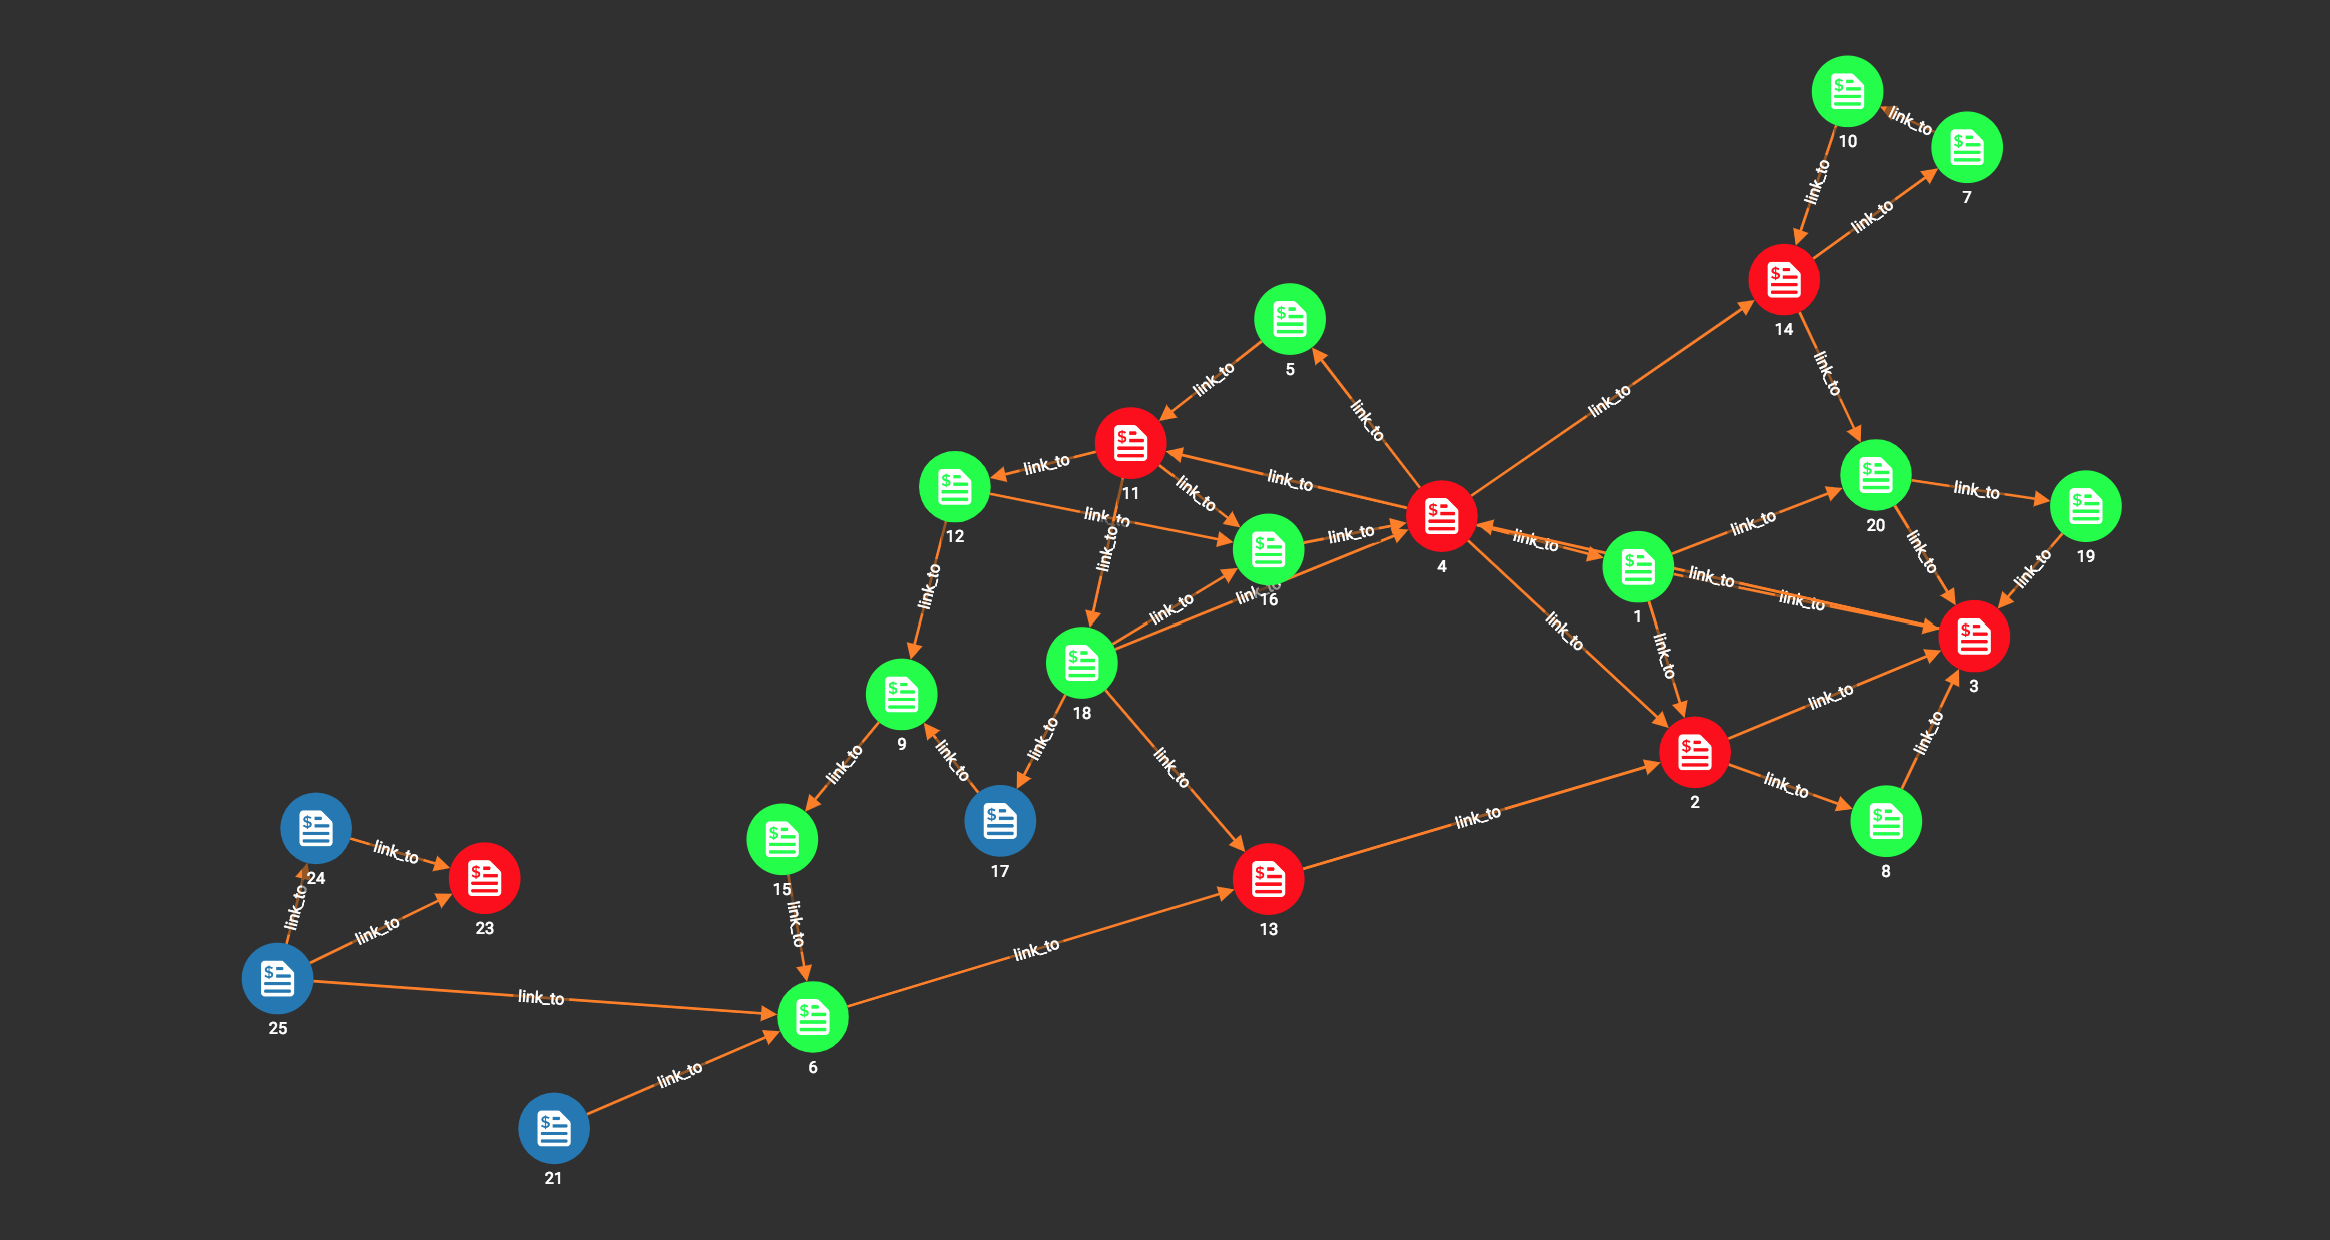
Click the APPLY button, then the different vertices will be rendered as different colors based on their page rank score ranges:
Similarly, you can change the color of edges.
If you want to cancel one color configuration, just click the remove button to the right side of that configuration.
Set different vertex radius and edge thickness according to attributes and accumulator values
By default, all vertices are of radius 40, and all edges are of thickness 2. You can configure vertex radius and edge thickness according to their attributes or numeric accumulator values of GSQL query result. A classical example is page rank. You can set vertices radius proportional to their page rank values, then the importance of each vertex is visually apparent according to its size.
First choose the vertex type whose radius you want to configure, then click the Edit buttonin Radius section. In the popup window you can create the radius expression:
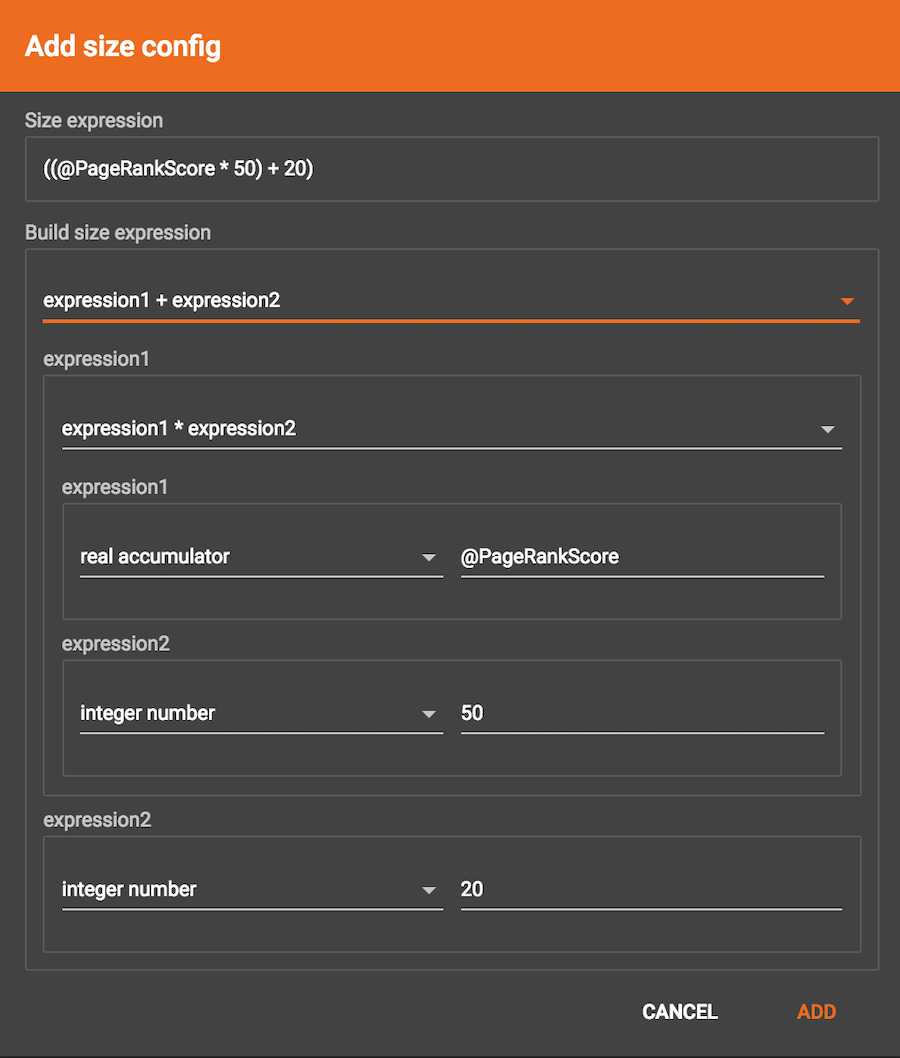
After click ADD button, the radius expression will be shown in Radius section:

After click APPLY button, the vertices will be rendered in different size according to the expression value:
Similarly, you can set different thickness for the edges.
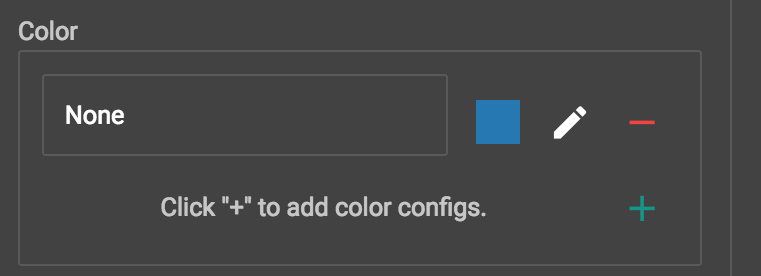
If you want to cancel the vertex radius or edge thickness configuration, click Edit button in Radius or Thickness section, in the pop-up window choose None in the top level expression dropdown list:
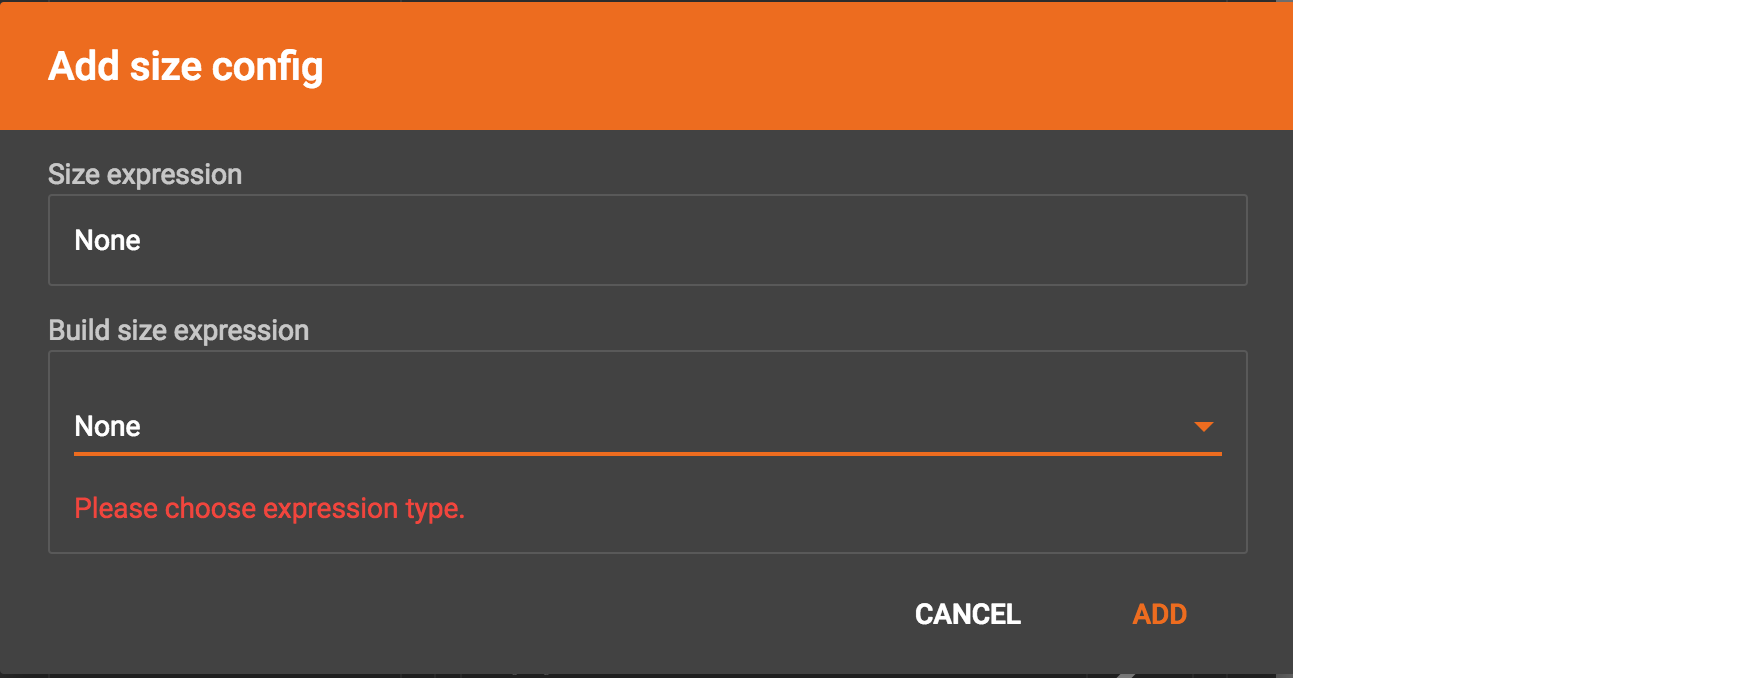
Click ADD, then click APPLY. The size will be changed back to uniform.
The size and color can be configured at same time. Here is the effect of setting both color and size for page rank vertices: